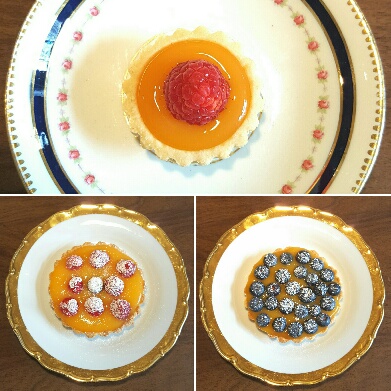
Fruit Custard Tarts by The Fat Foodie
Now that we’re starting to see a bit more sun on a daily basis thanks to the arrival of spring I’m finding myself more inclined to make desserts that incorporate lighter flavours, such as these fruit custard tarts. When I started eating dairy-free one of my best revelations to come from the vegan community was finding out that Bird’s Custard Powder doesn’t contain dairy. I found this really surprising, but I suppose it’s just because you expect such a sweet vanilla-based substance to be already creamy even before you add anything to it. Regardless, I’m grateful!
It feels a bit cheeky to be posting the recipe for these fruit custard tarts because they’re so easy to make, especially when I haven’t made my own custard, but they are really delicious so I figured I’d share it anyway. The pastry is very light and a bit crumbly, but I think that works very well with the sweet custard and berries.
It makes life so much easier if you bake the pastry in tart tins which have a removable base, but it’s not absolutely essential and you can just use a piece of greaseproof paper in the base to help take the pastry cases out of the tins instead. Also, don’t try to take the pastry cases out of the tins until they’re completely cold otherwise they’re more likely to break.
You can use any fruit you like in these tarts. I’d bought some raspberries and blueberries that were reduced to a ridiculously cheap price and that’s what I used, but you could make them more exotic by using coconut oil instead of butter for the pastry tarts and topping them with chunks of fresh pineapple. Whatever you choose to top them with, these fruit custard tarts are light, creamy and filled with flavour, perfect for dessert on a warm summer’s evening (or an optimistic Scottish spring night).
Ingredients for the tart cases:
70g gluten-free plain flour (I use Dove’s Farm G/F flour because it’s made with low FODMAP ingredients whereas many other gluten-free flours are made with high FODMAP options.)
30g ground almonds
1 tsp xanthan gum
20g caster sugar
3 tbsps rice milk
40g butter (or dairy-free version)
1 tsp vanilla extract
Ingredients for the custard filling:
40g sugar
1 pint (580ml) rice milk
Method:
Make the custard in accordance with the instructions on the pack and set it aside to cool.
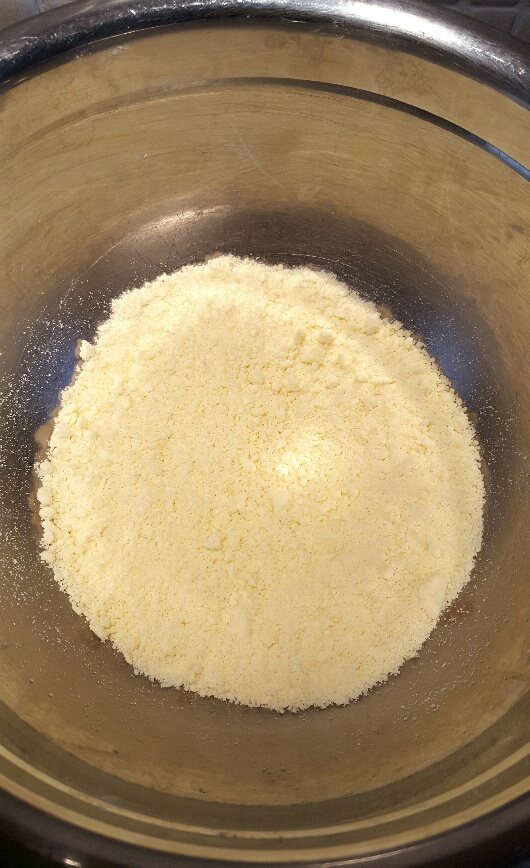
To make the pastry for the tarts, put everything except the milk into a mixing bowl and rub the butter into the dry ingredients with your fingers until it looks like fine sand.
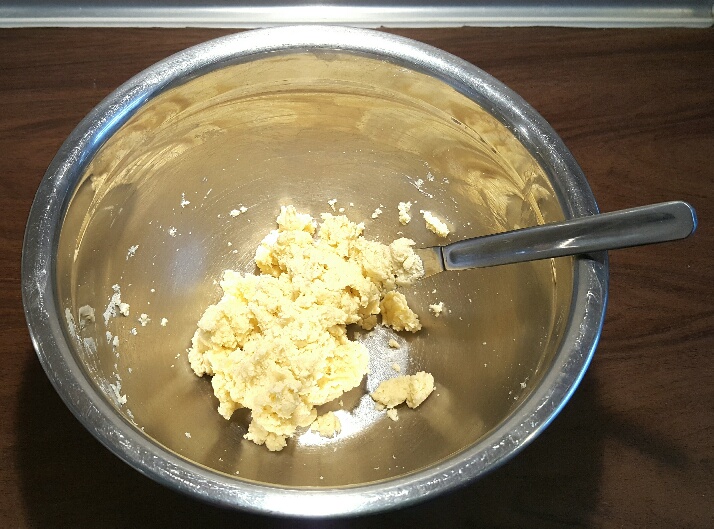
Preparing the Dough for the Fruit Custard Tarts
Add the milk a little at a time, stirring all the while, until it forms a dough. (You might not need to use all of the milk. It can depend on the individual batch of flour you’re using.)
Preparing the Dough for the Fruit Custard Tarts
Set your tart tins out on a large baking tray
and cut out two little squares of greaseproof paper for each tart that are big enough to line the base of your tart tins. (See the photo below if necessary.)
Preheat your oven to 200C/180C Fan/400F/Gas mark 6.
Put a piece of greaseproof paper in the bottom of each tart tin. Divide your dough into four and place a small lump of dough in each tart tin and mould to fit the tart tin
.
Put another piece of greaseproof paper on top of the pastry and put baking beans on top.
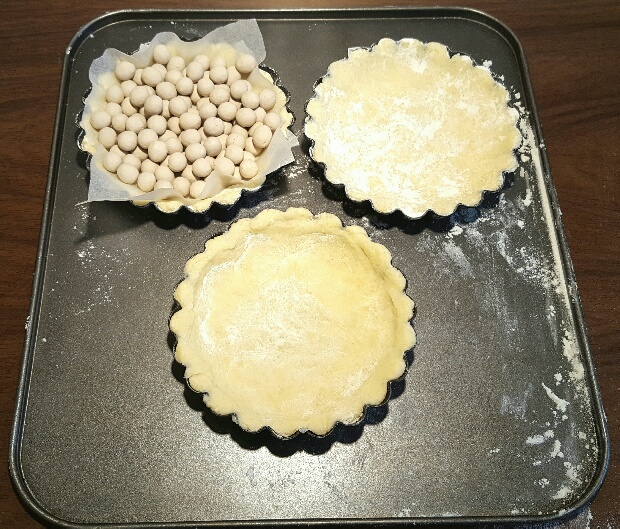
Putting the Dough in the Tart Tins
Bake in the oven for 15 mins and then remove the baking beans and bake for another 10 mins (or until the pastry cases are golden brown). Leave the tarts to cool on a cooling rack.
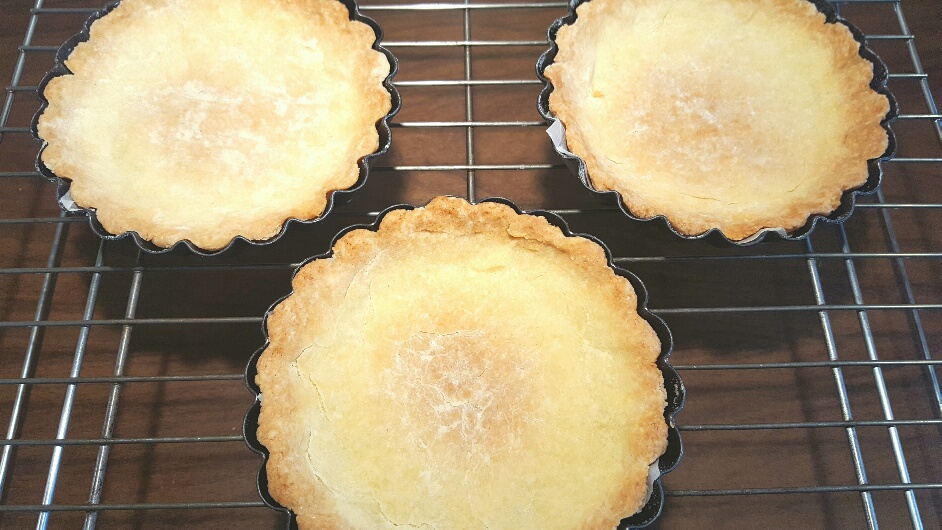
Baked Tart Cases
When the tarts and custard are cold, fill each tart case with custard and top with fresh fruit. Dust with icing sugar just before serving.
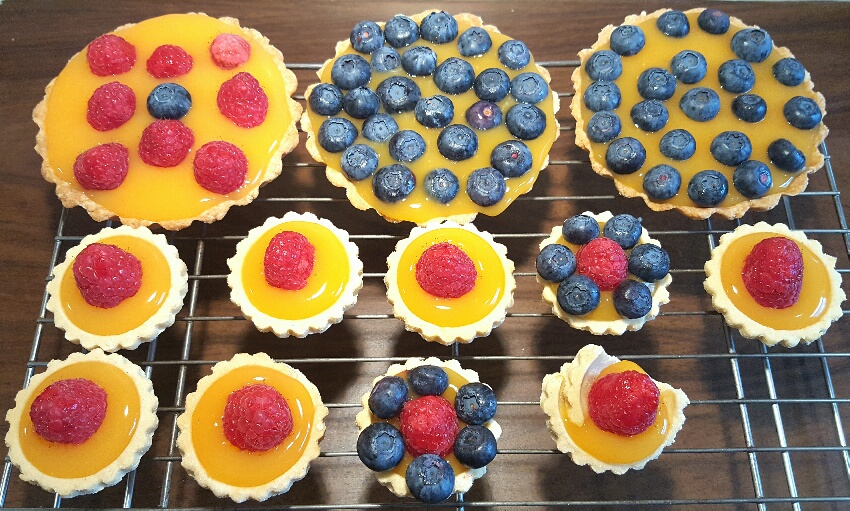
Freshly Filled Fruit Custard Tarts by The Fat Foodie
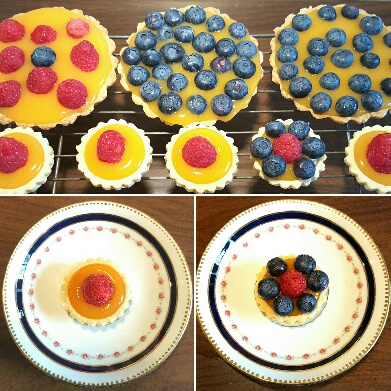
Freshly Filled Fruit Custard Tarts by The Fat Foodie
 Copyright protected by Digiprove © 2017