Raspberry Chocolate Torte (serves 8)

Raspberry Chocolate Torte by The Fat Foodie

The other day I made dairy-free chocolate truffles and I was so impressed with the truffle mixture that fills them that I decided to try and use it in another recipe. As I was eating the dairy-free chocolate truffles it occurred to me that the truffle mixture is very similar to a ganache, a rich, creamy chocolate filling mixture that is traditionally used to fill chocolate shells. I knew that the ideal counterpart to the smooth, silky chocolate ganache would be a biscuit base, so I proceeded to make a raspberry chocolate torte with it.

Continue reading

Digiprove sealCopyright protected by Digiprove © 2018

Chocolate Muffins (makes 12)

Chocolate Muffins by The Fat Foodie

Sometimes I make things that aren’t originally intended for my website, but when I taste the finished result I kick myself for not paying more attention and noting the ingredients down because it’s turned out to be a really tasty recipe. These chocolate muffins were one of those recipes. I’d had a number of sweet potatoes in the fridge that needed to be used up so I thought it’d be nice to make a batch of chocolate muffins to take into work the next day. Of course, it was only after I’d taken them into work and tasted them that I realised how lovely they were, leaving me to resolve that I’d make another batch very soon.

Although these chocolate muffins have sweet potato in them you can’t tell at all. The sweet potato simply bulks out the muffin mixture while adding moisture, body and sweetness to the sponge. The beauty of using the sweet potatoes in the chocolate muffins is that you can use less flour in the mix and it also adds a number of vitamins and minerals into the muffins that you wouldn’t ordinarily get from only using gluten-free flour.

I genuinely think that this is my go-to chocolate muffin recipe from now on because they are soft, light, moist and incredibly fudgy and you certainly can’t tell that they’re gluten-free. They’re everything you could possibly want in a chocolate muffin really.

Ingredients:

420g peeled raw sweet potatoes (cut into small chunks)

200g brown sugar

100g gluten-free flour (I use Dove’s Farm G/F flour because it’s made with low FODMAP ingredients whereas many other gluten-free flours are made with high FODMAP options.)

50g cocoa

100g chopped walnuts (optional)

2 large eggs

1 tsp baking powder

1/2 tsp bicarbonate of soda

1 tsp xanthan gum

140ml vegetable oil

1 tsp vanilla extract

140ml rice milk

1/2 tsp salt

For the chocolate muffin icing:

200g icing sugar

25g cocoa

Around 1 tbsp of water (but depends on how thick you want the icing to be)

Method:

Preheat your oven to 190C/170C Fan/375F/Gas mark 5.

Lay out 12 muffin cases in a muffin tray.

Prepare the sweet potatoes and cook them on a plate in the microwave until they are soft. Put the cooked sweet potato in a large mixing bowl, mash well and leave to cool.

Once the sweet potato is fairly cool, add all of your wet ingredients and mix well.

Add the dry ingredients and mix well.

Divide the mixture between the 12 muffin cases and bake in the oven for 30-35 mins or until a skewer pushed into the middle of one comes out clean. Leave to cool.

To make the icing, slowly stir the water into the icing sugar and cocoa to blend the icing together (you can make it as thick or thin as you like) and once you’re happy with the consistency pour it over the chocolate muffins.

Munch!

Chocolate Muffins by The Fat Foodie

Digiprove sealCopyright protected by Digiprove © 2017

Chocolate Torte (serves 6-8)

Chocolate Torte by The Fat Foodie

The other day I was walking home from work when my Dad stopped his car to say that he’d got me a clutch of fresh duck eggs from one of his colleagues. Never one to turn my nose up at free ingredients, particularly ones as generous as eight massive, freshly-lain duck eggs, I dutifully followed him home to collect them. Once I’d given them a wash (chickens aren’t that fussed about keeping their productions clean) I was rewarded with the sight of a bowlful of creamy, pink and blue, large eggs with striations that made them look like they’d been sculpted from marble. They were truly a thing of natural beauty.

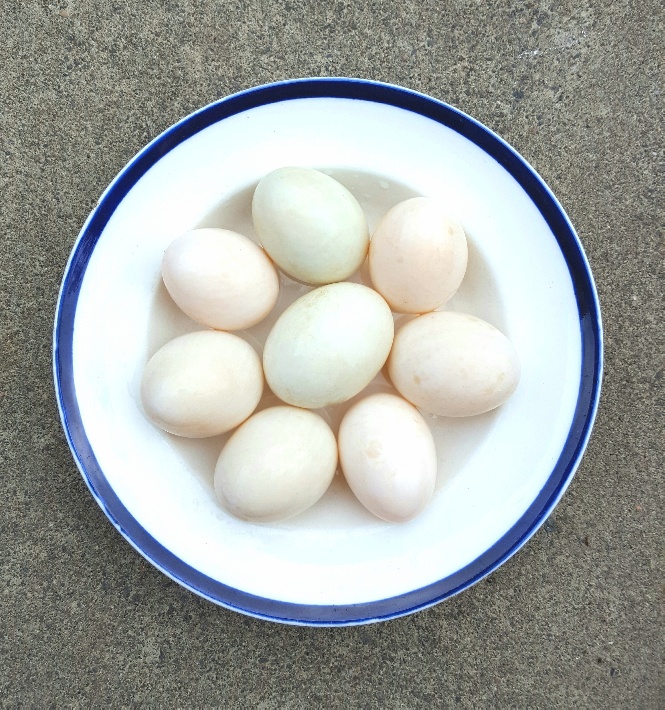
Freshly Lain Duck Eggs

Now I’d been wracking my brain trying to come up with a recipe that would do them justice. Duck eggs are very rich, infusing a delicate and delicious intensity into cakes and biscuits with very little effort, so I knew that I didn’t want to waste them on a bake that would fail to let them shine. After some consideration I knew that a chocolate torte would be the perfect vehicle for their use because the richness of the torte would only be enhanced by the duck eggs.

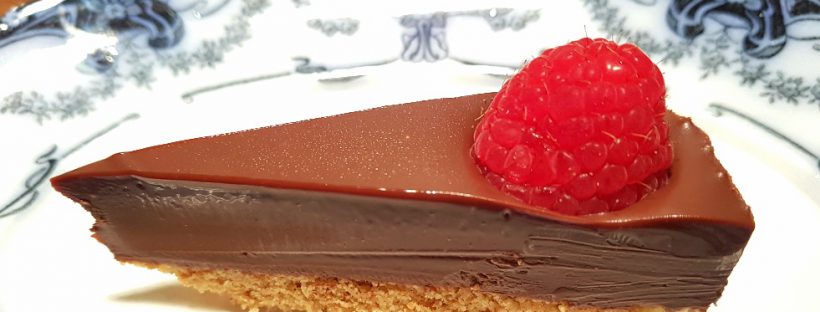
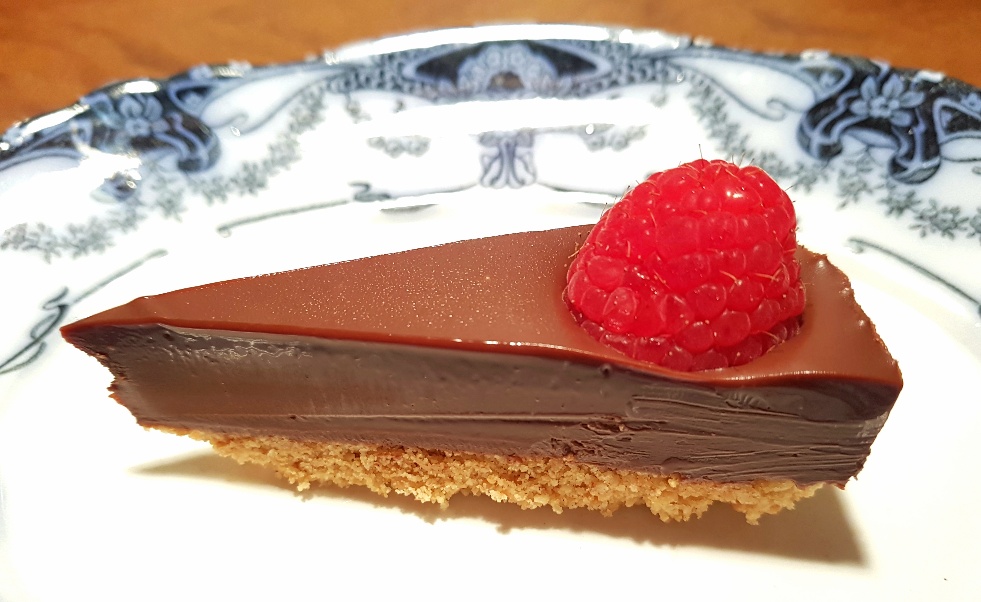
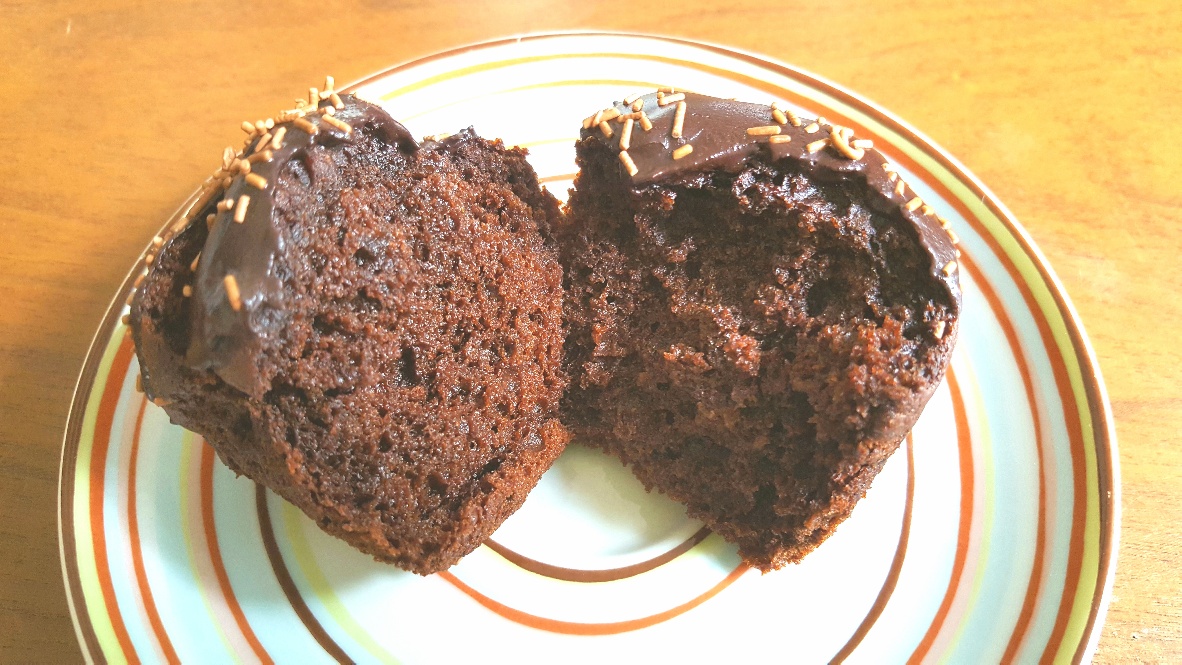
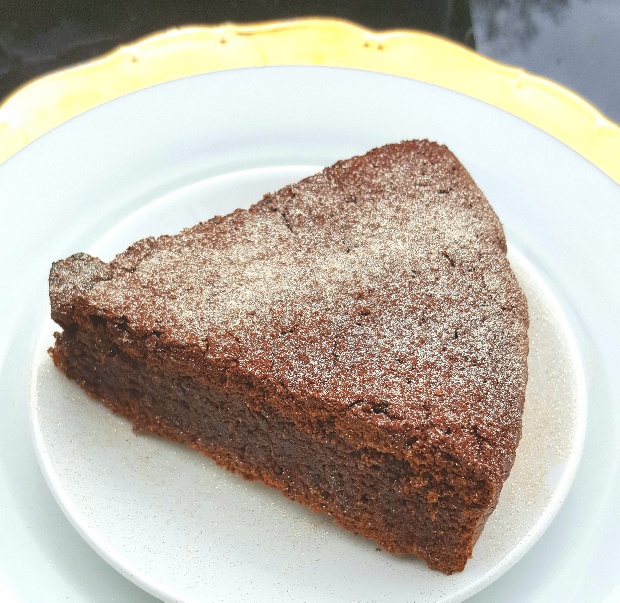
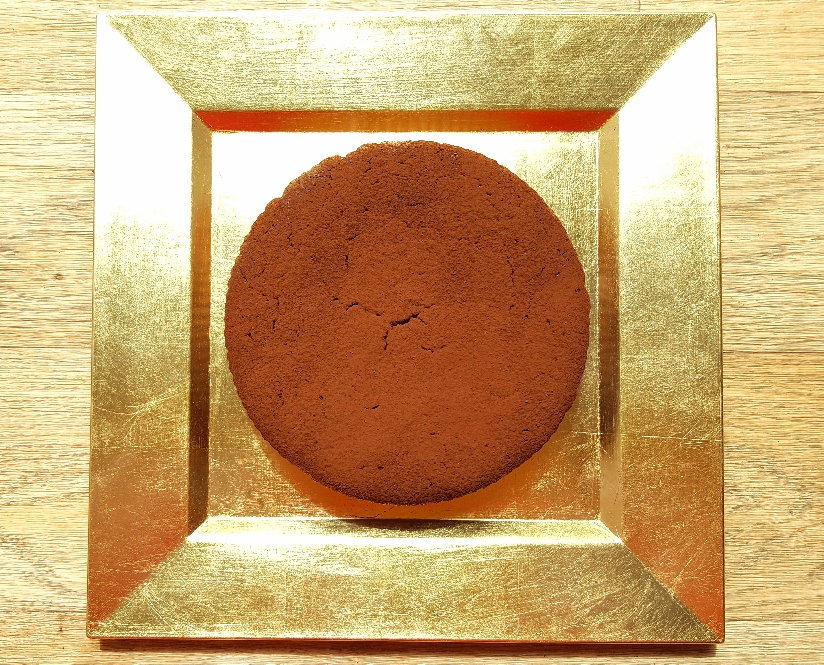
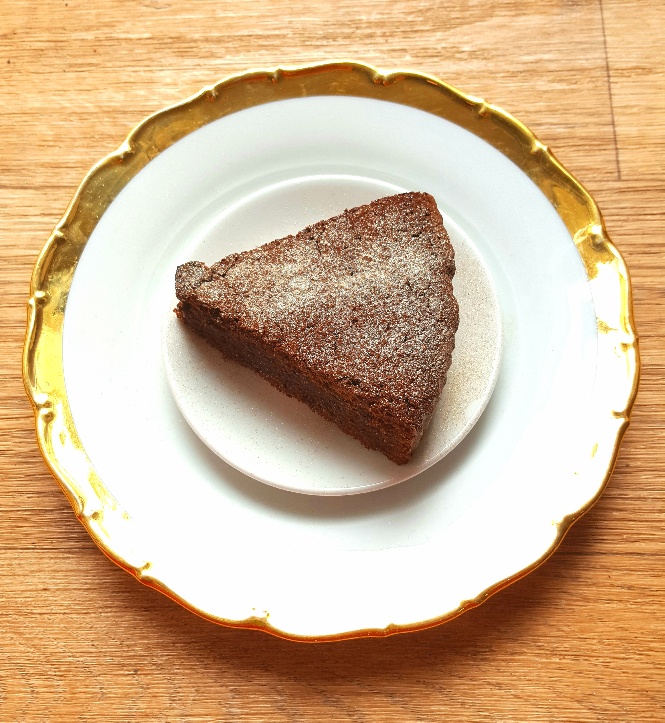
A chocolate torte is a very rich, buttery and intensely chocolatey  cake. It’s not made with a flour sponge like most cakes are and instead depends on the lightness of whisked eggs (and in this case a small amount of ground almonds) to provide the structure of the cake. Accordingly, the result is a slightly dense, but infinitely moreish, chocolate torte that requires only a small serving to satisfy one’s sweet tooth.

Much like pavlovas and profiteroles, this bake looks complicated and its reputation only bolsters this misconception, but trust me, this chocolate torte is really easy to make. It literally only requires you to melt your butter and dark chocolate in one jug, whisk all of your other ingredients together in another jug and then pour one into the other before whisking again and baking. You can’t really get any easier than that, can you?

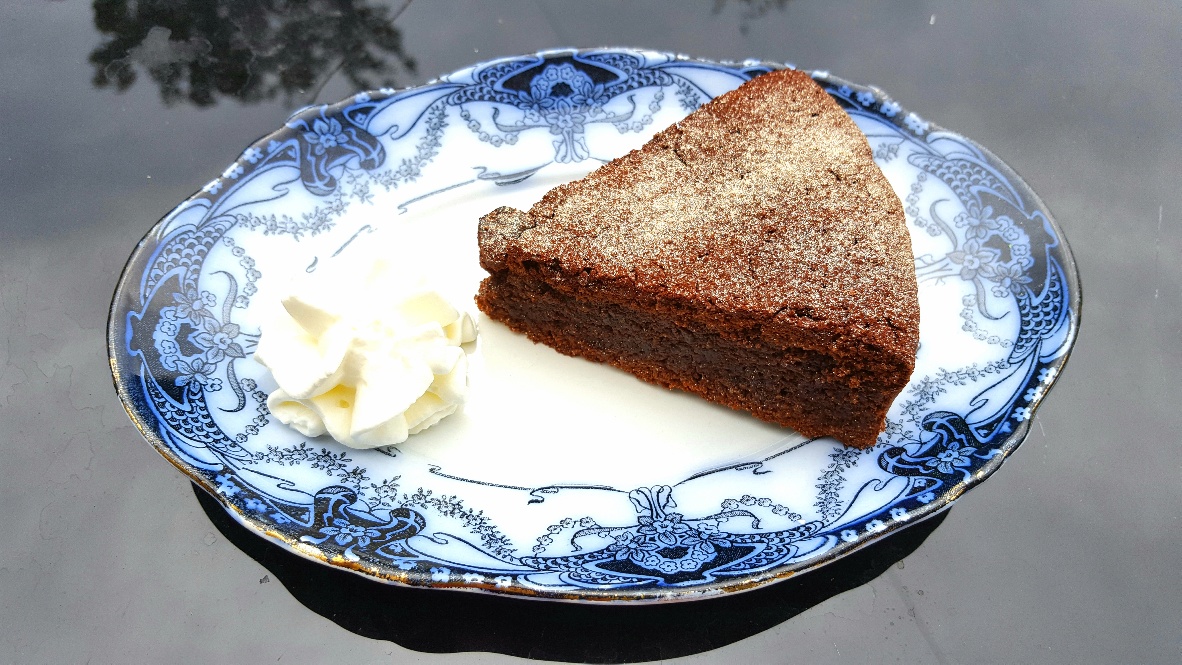
This chocolate torte is a dream to both make and eat, particularly when served with a dollop of whipped cream or a scoop of good quality ice-cream. It’s a torte that is decadent and luxurious, with a rich, fudgy, but light cake base that delivers the perfect chocolate hit to the taste buds. Try making this one soon, guys, you won’t regret it.

Chocolate Torte by The Fat Foodie

Ingredients:

85g salted butter (at room temperature)

170g dark chocolate (broken into small pieces)

4 large hen’s eggs (or 3 duck eggs, if using)

50g sugar

2 tsps of instant coffee granules

1/2 tsp of ground cinnamon

50g ground almonds

1/2 tsp vanilla extract

Cocoa powder (for dusting the top)

Method:

Preheat your oven to 180C/160C Fan/350F/Gas mark 4.

Line a 9 inch cake tin with greaseproof paper.

Place your butter and dark chocolate in a microwavable jug and slowly melt in the microwave, stirring frequently so the chocolate doesn’t burn. If you don’t have a microwave then melt it slowly by placing the jug in a pot that’s been filled with boiling water (but is not on the heat) and allowing it to melt down. (Don’t have the pot over heat though or you might melt your jug!)

Leave the melted chocolate mixture to cool slightly.

Measure all of your other ingredients into a separate jug and whisk well until thoroughly combined and airy.

Slowly pour the chocolate mixture into the other jug, whisking all the while. Mix it all together and then pour into your cake tin and bake for 40-45 mins.

Check the cake is cooked by poking a skewer into the middle. It should be cooked when only a few crumbs are on the skewer when removed from the cake, but remember that it is supposed to be moist and fudgy in the middle so don’t panic too much if it’s a bit wetter than a normal cake.

Leave to cool and then dust with cocoa powder and serve with whipped cream or ice-cream (or a non-dairy alternative).

Chocolate Torte by The Fat Foodie

Chocolate Torte by The Fat Foodie

Digiprove sealCopyright protected by Digiprove © 2017

Whoopie Pies (makes 10)

Whoopie Pies by The Fat Foodie

A while ago I made chocolate bundt cakes to celebrate my 100th blog post and the sponge I made them with was so tasty that I wanted to try making other things with it. I’ve always loved whoopie pies, but sometimes shop-bought whoopie pies can be a bit too sickly because they have too much filling inside them and the quality of the buttercream icing often leaves a lot to be desired. The beauty of baking your own therefore, is that you can control the buttercream icing to baked sponge ratio to suit your own taste.

Although I used a proper whoopie pie tin it’s not completely necessary because you could just use a yorkshire pudding tin or something like it to bake your whoopie pies in. All you’re looking for is something that’ll control the spread of the sponge as it bakes and allow it to rise. In fact, if you don’t mind your whoopies looking a little odd you could even use a traditional fairycake shallow tin to bake them in.

I made my whoopie pies traditional chocolate ones, but you could omit the cocoa powder and make them with other flavours instead, such as vanilla (using 1 tsp vanilla extract), lemon (using the zest of 1 lemon) or bake them as a plain sponge but sandwich them with strawberry jam as well as buttercream icing.

I can highly recommend making the chocolate whoopie pies though because they result in two rich, moist chocolate sponges that are bonded together with a lightly whipped decadent cocoa buttercream, creating the perfect cake for one. One whoopie pie is a low FODMAP portion, but stopping at only eating one is a different matter entirely though.

Ingredients:

220g dark brown sugar
120g fine polenta
50g gluten-free flour (I use Dove’s Farm G/F flour because it’s made with low FODMAP ingredients whereas many other gluten-free flours are made with high FODMAP options.)
90g ground almonds
50g cocoa powder
A pinch of salt
2 tsps baking powder
1/2 tsp of bicarbonate of soda
120g butter (or dairy-free version)
100g coconut oil (melted)
4 eggs
60ml rice milk
For the buttercream:
150g butter (or dairy-free version)
170g icing sugar
30g cocoa
1 tbsp rice milk

Method:

Preheat your oven to 180C/160C Fan/350F/Gas mark 4.

Lay out your whoopie pie tins and give them a light greasing before dusting them with flour.

Measure all of the wet ingredients into a mixing bowl.

Measure all of the dry ingredients into another bowl and give it a stir.

Add the dry ingredients into the wet ingredients and mix well.

Pour equal amounts of the cake mix into the whoopie pie tins.

Bake in the oven for around 10-12 mins. (They’re cooked if a skewer pushed into the middle of a couple of the cakes comes out entirely clean.)

Leave to cool on a cooling rack before taking the whoopie pies out of the tin.

Place your buttercream ingredients in a large mixing bowl and whisk together.

Once cool, sandwich the whoopie pies with the buttercream icing.

Whoopie Pies by The Fat Foodie

Digiprove sealCopyright protected by Digiprove © 2017-2018